Introduction
When I reviewed the results of the technology survery you took on Week 1, I noticed that most of you were already familiar with how to use Google Drive. This is good news because you will find this week quite easy. This week I am going to cover the following:
- How to access Google Drive
- What can one do with Google Drive
- How to create a file (Google Docs, Sheets, and Slides) in Google Drive
- How to work with the sharing settings in Google Drive and with a select list of Google Apps
Many universities and companies use Google email and apps to run the day-to-day operations, like email and backing up files to Google Drive. The information techology staff I have worked with like using Google Apps because Google takes care of a lot of security and technical infrastructure, which frees them up to do other IT-related tasks.
Google Drive Basics
I have put together a series of screenshots that show you how I access Google Drive. The easiest and quickest way to access the Drive is to go to the web address www.drive.google.com. If you are logged into your Google account (email) then your drive will come up when you go to drive.google.com. If you are not logged in then you will be prompted to do so when visiting this site.
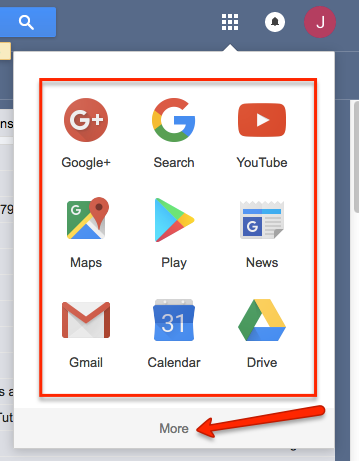
I am usually logged into Google and use my personal gmail account. When I am in my email page I access the drive by clicking on the grid in the top right-hand corner of the email page. Here is an image of the grid:

When I click on the grid I see a basic menu:
I can see even more apps if I select "More"
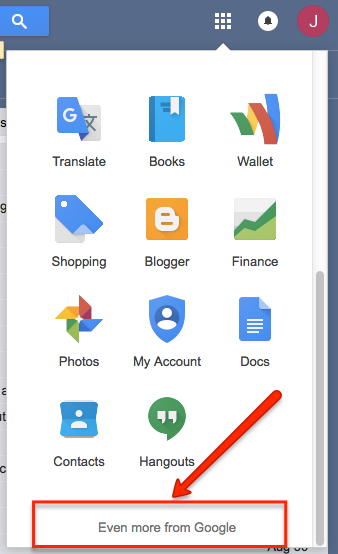
And if I don't see what I am looking for here I can click on "Even More" to go to a whole page of Google Apps.
This will be important to know when we work on creating a Google Sites web page.

Creating Files and Folders in Google Drive
I use Google Drive to store my files at home and at work because I can access it on my phone and on any computer with an internet connection, which is the beauty of a cloud drive.
You can access your Google Drive by using the grid method I described above or going to www.drive.google.com after loggin into you Google account.
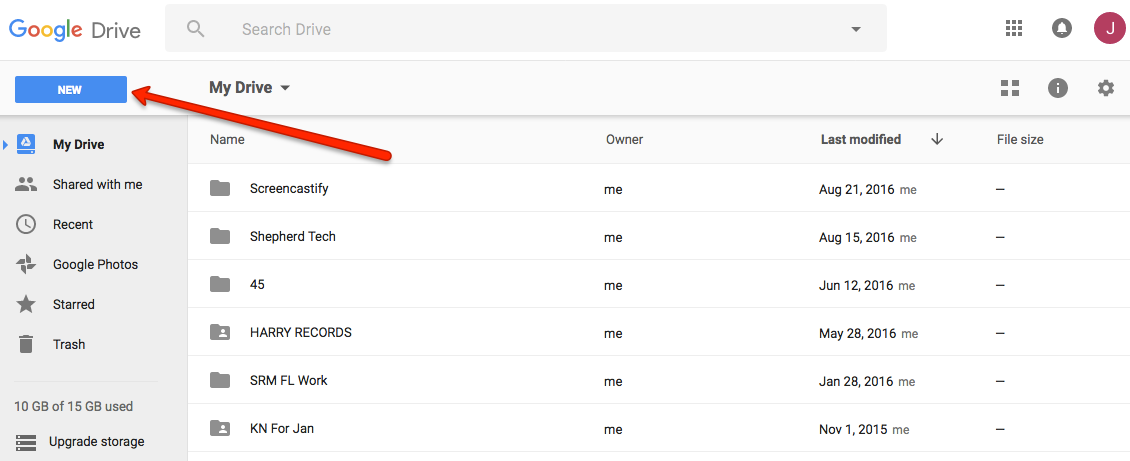
Once you are in your Drive you can create and upload files. The images below take you through a quick tutorial on how to add a few basic Google Apps.
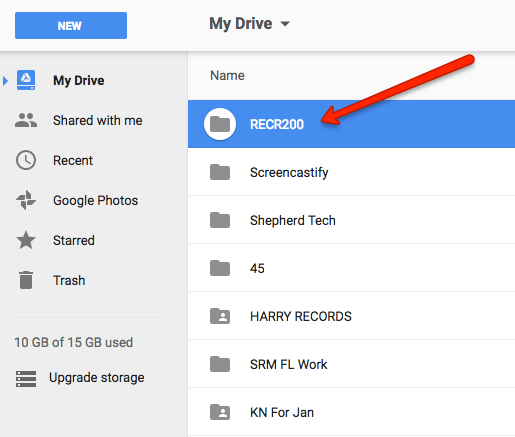
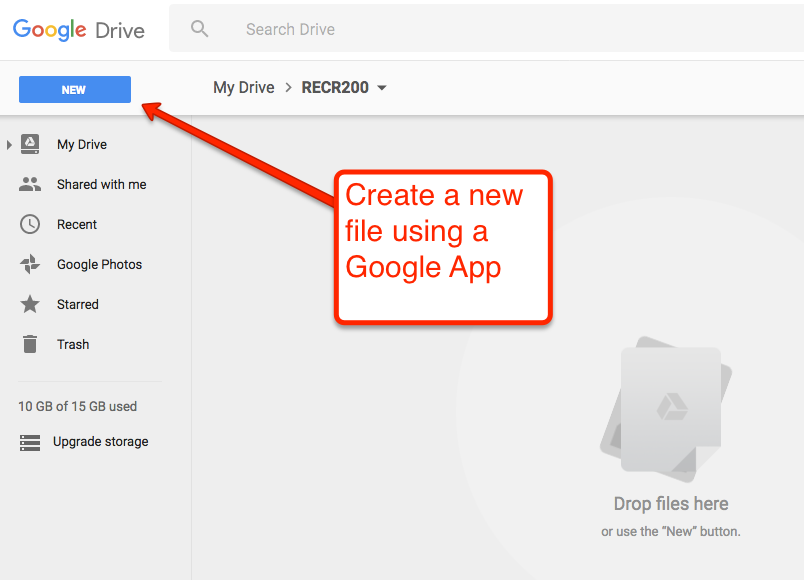
Click on the "New" tab in the upper left-hand corner of your Drive page.
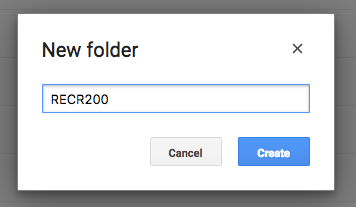
Add a folder witht his button (image below)

Label the folder "RECR 200" or another applicable name you will remember.
When you go back to your drive you will see your new folder.
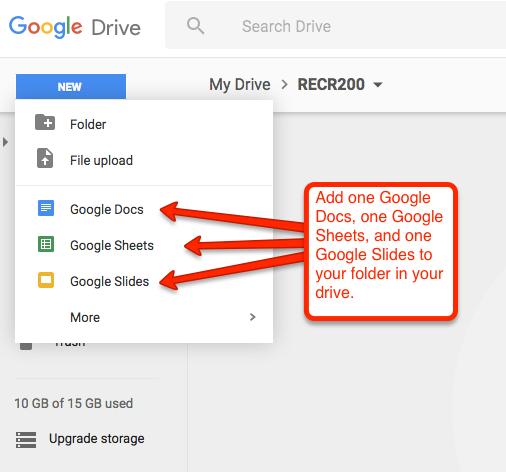
You can upload your file by dragging the icon to this web page or creating a file using the "New Button" a few steps earlier in these instructions.
Try adding a Google Doc, Sheet, and Slides files to your drive to see how the process works and help you get set up for completing your assignment.
Rename the file so you will remember it.
Sharing Settings
One of the most common features of Google apps that I use is sharing, or permissions, settings. For example, I have created a Google Doc, saved it in my drive, and then shared it with three or four other collaborators. I give them permissions to "edit" the document and we each add our content.
There are a few ways to work with permissions settings.
If you look in the upper right-hand corner of a Google Doc, Sheets, Folder, or other app, you will see a blue "Permissions" button.
When you click this button you will see a number of ways to add permissions.
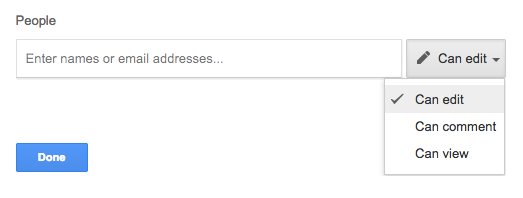
One is to give someone access by adding their email. There are three options, or access, you can give someone when you add the to the document or folder:
- Can edit - The person you add has the same access you do and can change the document, download it, and add other users.
- Can view - The person you add to the app can view only and cannot make any changes
- Can comment - the person you add can make comments, which will show up in another color or text box. As the owner of the document, you can accept or delete changes.
When you click the "Advanced" link an additional window will give you more sharing options (see below).
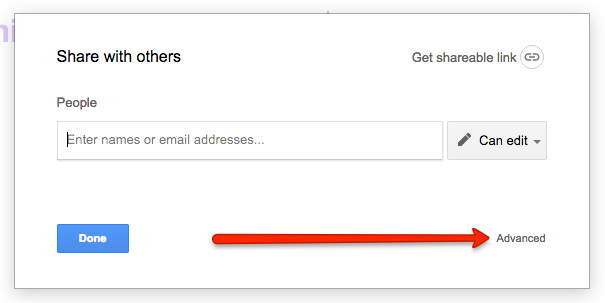
You can share your work using a link. And like the email permissions above, you have the choice of allowing "view," "comment," or "edit." These features function similarly to the email sharing permissions. The only difference here is that you are not adding people to the app, you are sharing it using a link. I use this option when I need to share the item with a large group of people and I do not have time to add their emails individually.
One very important note about sharing is that the person you are sharing your information with also has to have a Google account if you want them to edit or collaborate on a document. If they do not have an account, the best access they can have is to view.
When you are collaborating on a cofidential document, I highly recommend that you add by individual email only so you have a specific record of who is accessing the document. It is easy for a link to get sent out to the wrong person who could potentially access the information and break confidentiality.
Here is a video that sums up the sharing and permission settings with Google Docs:
Downloading, Uploading, and Formats
The other feature I use commonly with Google Apps is uploading a MS Word Document and converting it to a Google doc to collaborate with others and then downloading it back to Word when I am finished. This has helped me get the feedback on a report or work project quickly and it is in Google Drive and not lost in my email inbox.
Here are two videos that describe this process:
Video 1:
Video 2:
Week 5 Assignment
This week's assignment involves using Google Drive to create a folder, save a Word file in this folder, convert it to pdf, and then share it with me.